
In this blog post we will cover the last 5 steps for creating the perfect Paris gallery wall.
If you haven’t read Paris Gallery Wall Part 1, or need to refresh your memory, now’s the time.
These next five steps are needed to take your gallery wall from a collection of ideas, prints, frames and other bits and pieces, to a beautiful, finished, installed Paris gallery wall that you will be proud of.

The Rules
When it comes to creating a gallery wall, there are no rules! Well, maybe there is one: when you have finished, you must have a gallery wall that you love and, if others are going to share it with you, that others love too.
There are many ways to achieve that; many opinions and much advice on how a gallery wall should look; many, many useful tips (no point making all the mistakes that others have already made and have had the kindness to document and warn others about); helpful guidelines.
It’s definitely worth looking at examples of gallery walls to see what others have done, noting what you like and don’t like about them. Pinterest has many. So does Instagram. There are numerous videos on how to create a gallery wall. Some are definitely worth watching.
But don’t take any of these as the final word on gallery walls. There really isn’t a final word (and that includes our blog posts!)
So, let’s get going.
Preliminary Step
If you have not already done so, or if you need a refresher, read or reread Paris Gallery Wall Part 1.

STEP 6. Frames and Framing
If you have been following along this far, you should have a collection of items you want to include in your gallery wall. Some will already be framed. But others will require framing: photographs, paintings, prints, drawings, items of decoration, quotations, and so on.
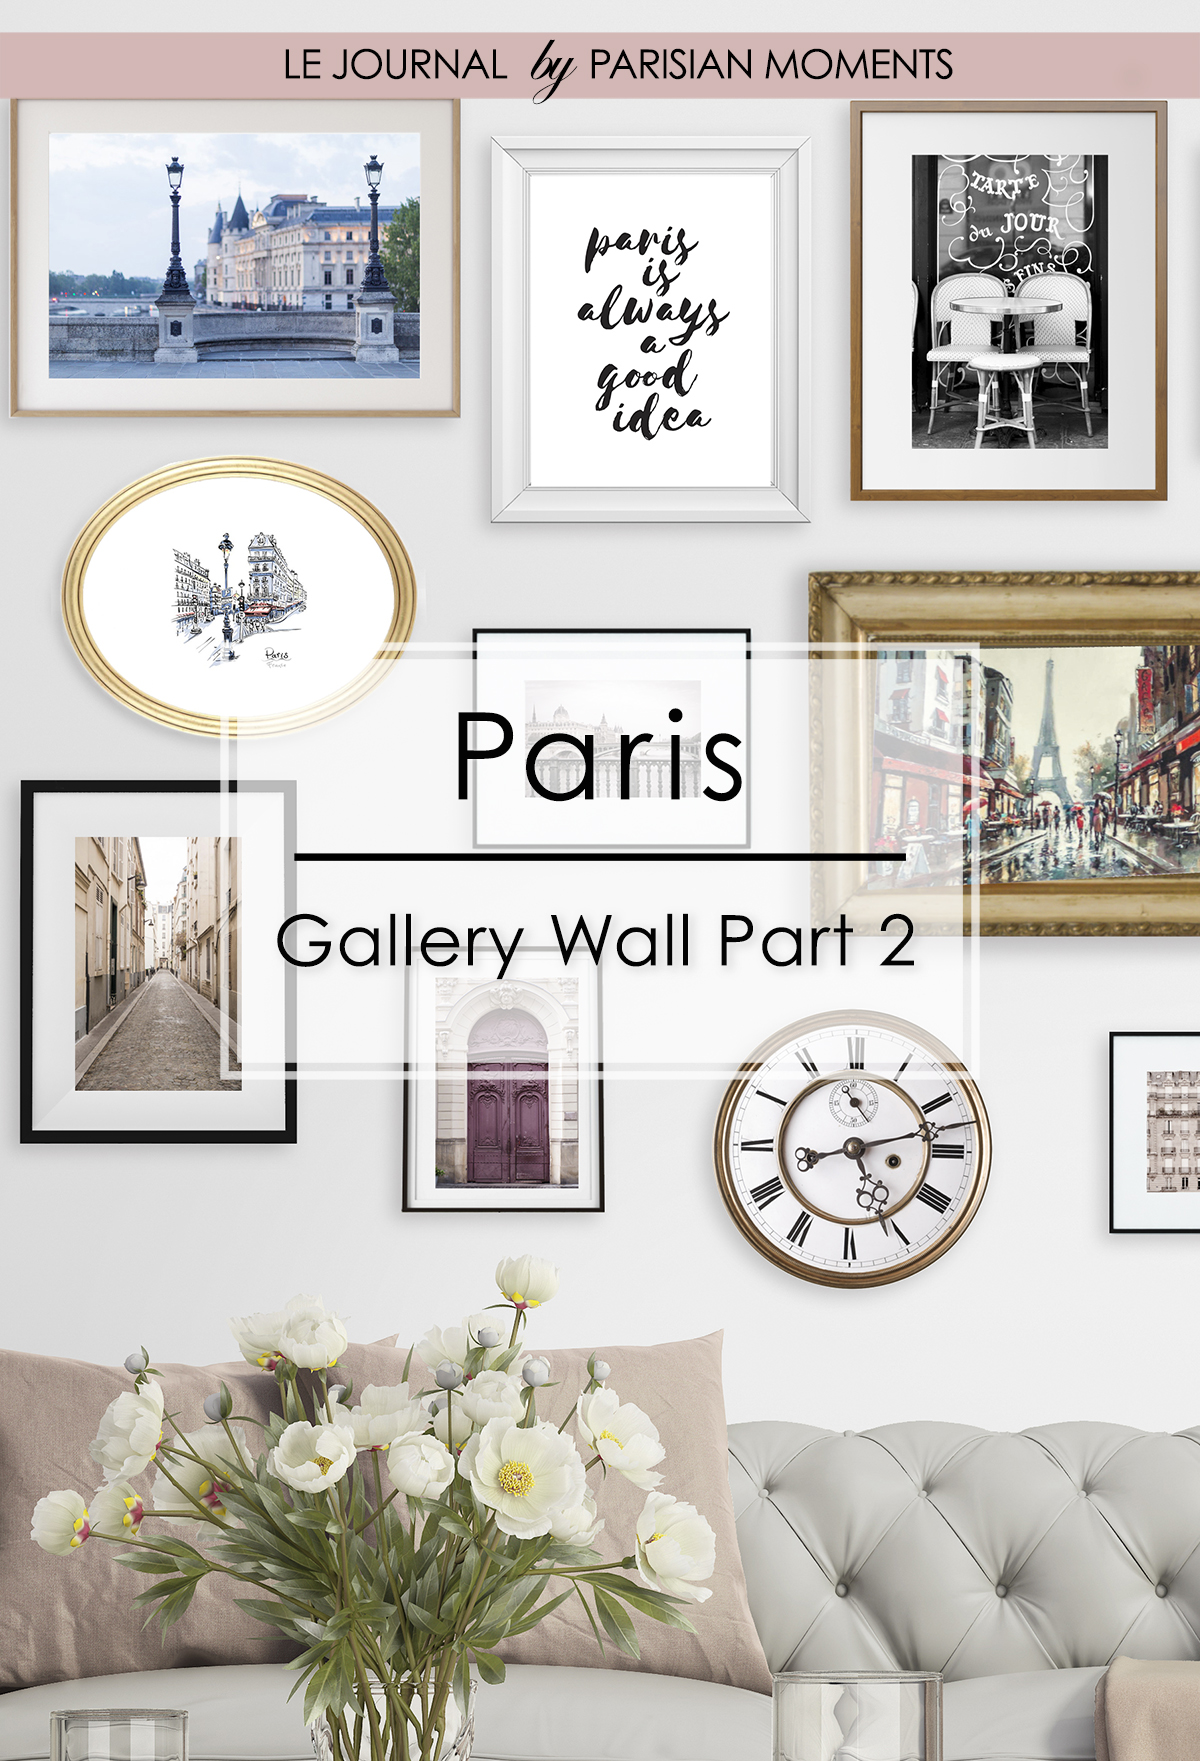
Many gallery wall gurus will tell you that it’s best to have a variety of sizes, shapes, colors, materials and thickness of frame. This is a good idea if it fits the type of gallery wall you are trying to create – something fairly informal and spontaneous. You can see that in the example at the top of this blog post..
However, it may better suit your purposes to have a gallery wall in which all the frames are exactly the same size, type and color: elegant and more formal.

Or in which the frames are all exactly the same style and color but vary in size. This lends harmony and uniformity to the gallery wall while also including some variety.


As part of Step 6 you do need to make decisions about frames and you need to frame your artwork or get it framed and ready to hang.
If you don’t have all the artwork you want to include, get hold of the rest of it as part of this step and get it framed where needed.
So by the end of this step you should have all your artwork and objects gathered up and all the items that need framing, framed. It’s fine to have a few too many items. And it’s also perfectly OK to find out later that something is missing and add it.
STEP 7. The Layout
The purpose of this step is to establish what is going to go where and how much space there will be in between. It’s the design and layout step.
You can sketch it out on a piece of paper or on a tablet or computer to get an idea of the overall design of the elements that will make up your gallery wall. You can draw it to scale if it helps you work it out.

This is a great chart with sample layouts. It comes from Indulgy and they have a lot more examples along with other valuable hints and tips.
One popular approach which is quite workable is to measure accurately the space where your gallery wall is going to go and then tape or mark out an area of those exact dimensions on the floor. This makes it easy to position the various frames and objects so you can see how they go together, readjust and make changes before you start making holes in your wall.

Early stages, but laying out the various elements on the floor makes it much easier to judge balance, spacing, position, etc. You can see right away that this layout is going to need a lot of work to get it just right.
Some (brave or very experienced) people go straight into Step 8 or even Step 9, pretty much winging it when it comes to the layout. They start off with one item or piece and either hang it or tape paper to the wall to indicate size and position and go from there.
We are of the opinion that you will probably be happier with the final result if you start off with a rough sketch but then lay everything out on the floor and adjust and readjust until you are happy with the final results before you start hanging the pieces – particularly if you are relatively new to gallery walls.
Whatever method or combination of methods you use, this step is very important. It can take a lot of work to come up with the perfect arrangement of the items in your gallery wall so that they go together well and tell the story you want them to tell. It’s worth the time and effort. You are going to live with this gallery wall and be delighted with it or not.
Step 8. The Mock-up
In this step you will create a mock-up of your gallery wall with paper and tape with all the exact shapes and sizes accurately positioned on the wall.
Not everyone does this. Some people go from a sketch or from laying things out on the floor straight to attaching the pieces to the wall.
However, to play it safe and to make sure you will be really happy with the final result, it might be best to do this step, particularly if you are new to this process.
Once your frames and items are laid out the way you want them on the floor, turn your frames over so they are face down, and cut out pieces of paper to the exact size and shape of the outside of each frame (or other object). If the frames have full size paper inserts in them, you can take those out and use them. On the paper be sure to mark where the nail or screw will have to go in the wall (if you are using nails or screws – see next step for alternatives). Also write on the piece of paper what each item is so you don’t get confused: “Photo of Eiffel Tower B&W,” “Painting of Pont Neuf,” etc.
Then tape each piece of paper to the wall using masking tape to show where that frame or item will go. Do this accurately. Adjust as needed. Stand back and look at the final result. You can make all the changes you want at this point. You can also go back to your floor arrangement if you’re not sure about certain elements or juxtapositions. Look at the arrangement from different distances and angles. When you’re happy with it, leave it for a while and come back and look at it again later. Get others to look at it too and tell you what they think.

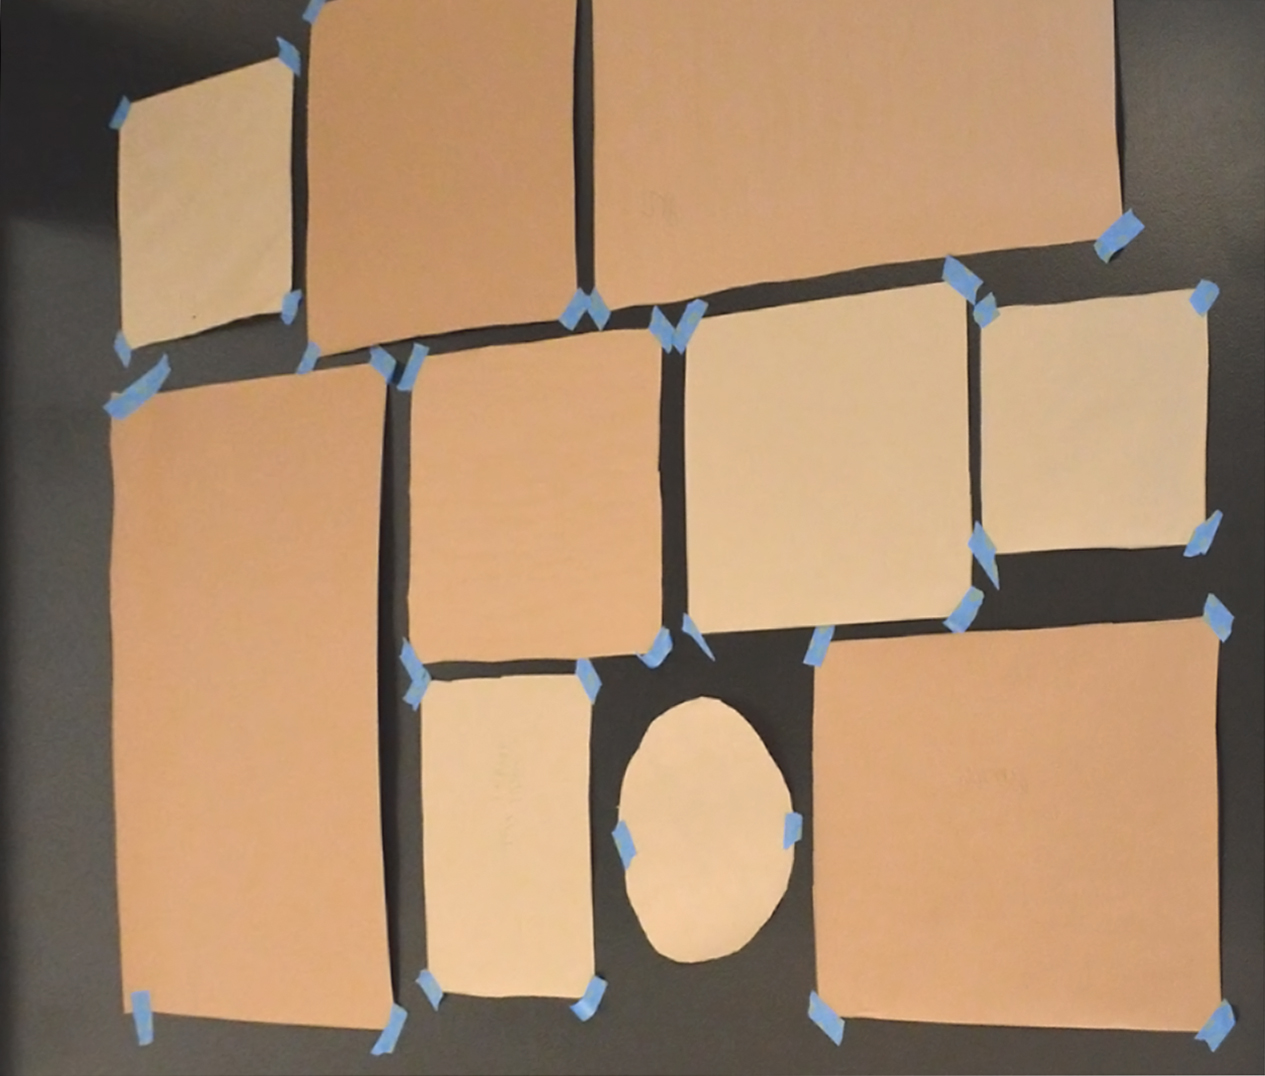
The end result of this step is a full-size mock-up of your gallery wall in paper, on the wall where the final pieces will go.
An advantage of having paper taped accurately in place on the wall with the point of attachment marked, is that you can hammer your nail straight through the paper in the exact location needed and then simply strip away the paper. This saves a lot of measuring.
Step 9. Attach frames and items to wall
If you are going for a grid of frames, they must all align perfectly both horizontally and vertically and be evenly spaced or the result will be off-putting.

If you have decided to align all the tops or all the bottoms or to create a rectangle or square, then your lines need to be straight, your frames accurately positioned.
If you are going for a more random arrangement, then precision is not so important. Just make sure it’s balanced, well-spaced and harmonious. This can be worked out by eye.


There are two main ways to attach frames to a wall (these are not the only ways, just the most common):
You can use nails or screws, with or without a hook and hang the frame by a wire on the back or by a saw-tooth hanger which some frames come with, or a D-ring hanger. There are many types of hardware, all of which require a screw or nail in the wall, with or without a hook.


Or you can use 3M’s Command Hanging Strips which do not require making a hole in the wall or marking it. They are basically pairs of interlocking strips, one half of which attaches to the wall and the other to the frame or item you are hanging. They are easy to adjust and move and can be removed from the wall without leaving any mark. There is much to be said for Command Strips. And they hold up very well.


It’s entirely up to you which method you use. However you go about it, by the time you are done with this step you will have your frames, pictures and other items in place hanging on the wall where you want them to be.
STEP 10. Review, Tweak, Adjust
If you’ve done all the previous steps thoroughly and taken your time over them, this last step should really just consist of standing back, heaving a big sigh of relief and pleasure and soaking up the admiration and delight of family members and friends who see your creation.
However, it’s worth taking a critical view and making sure it really is just the way you want it. It’s not too late to make changes. So if something isn’t quite right, deal with it. Change the frame. Add an element for greater variety. Get another photograph that fits better. Move a frame on the wall (you’ll be happy if you chose to use Command Strips but nail holes can be patched).

Well, it’s over to you now. A gallery wall is not for everyone. But if you’ve followed along this far, chances are you at least are interested. We hope we have helped make it less daunting and more doable. It is really not that hard to do once you get down to it.
We’ll be happy to help with what we do best – provide beautiful images of Paris and France in print or canvas form in a variety of sizes. We can make suggestions if you write to us for help.
GALLERY WALL COMPETITION
As promised, we are planning a Paris gallery wall competition with great prizes for the winners. We will announce the competition details very soon to our mailing list and on Instagram. The competition will run for a month and we will be posting competition entries on Instagram during that time. We hope you will participate.
One rule for sure is that the winning gallery wall(s) must include at least one print or canvas from our shop. We have a huge selection to choose from so feel free to browse. You might get some unexpected ideas. As usual, if you are looking for an image you would like a print or canvas of but do not see it listed in the shop, just contact us with the details of what you would like. We will help if we can.
Thanks very much for reading. We would love you to leave a comment and share this blog post with friends or anyone you think might be interested. If you have questions, we do read and answer every comment and question.
À bientôt!
Georgianna and David